Simplifying Angular CLI for Beginners
So you want to write your first Angular application, however setting up even a ‘Hello World’ Angular application is not easy.
So you want to write your first Angular application, however setting up even a ‘Hello World’ Angular application is not easy. It requires many steps such as:
- Setting up a TypeScript compiler, if you choose to use TypeScript
- Configuration of Webpack or other module loader
- Setting up local web development server
- Installing and configuring dependencies
- Configuring Unit Test environment
- Configuring End to End Test environment
- Working with Continuous Delivery
- Working with Continuous Integration and many more.
You can perform all these tasks manually, but this will require a strong understanding of all these concepts and will make starting a new project very time consuming. To solve this problem, Angular comes with the Angular Command Line Interface (CLI).
Learn more about it here: https://cli.angular.io/
All these tasks are taken care of by Angular CLI, which is a command line tool for creating, testing, and deploying Angular apps. It is recommended to use Angular CLI for creating Angular apps, as you do not need to spend time installing and configuring all the required dependencies and wiring everything together. It provides you with many boilerplates and saves your time.
It uses Webpack to include all the packaging, the loading module, importing functionality, BrowserLink and more. The entire Webpack configuration is done completely by CLI so you don’t have to worry about it. It also configures Jasmine and Karma for unit tests and TypeScript complier to transpile TypeScript file to JavaScript etc. Let us see how we can work with Angular CLI.
Installation of Angular CLI
You can install Angular CLI globally on a local development machine using npm.
To work with npm, make sure to install NodeJS from here : https://nodejs.org/en/. Once NodeJS is installed, you can use npm to install Angular CLI. To find whether NodeJS is installed, run the command
node –v

You should see the NodeJS version number returned. Once NodeJS is installed, you need to make sure whether npm is installed or not. On Windows with nodeJS installer, npm will also be installed. However, you can use also use a command to install it:
npm install -g npm
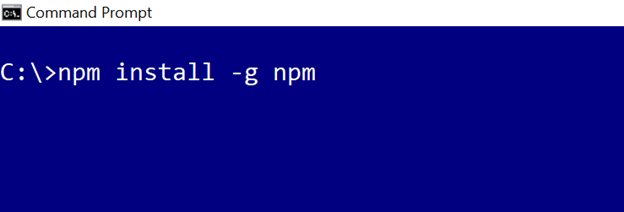
You can use –v alias to check the npm version installed:

After that, do the following to install Angular CLI:
npm install @angular/cli -g

You have now installed Angular CLI globally. To check whether Angular CLI is installed run this command:
ng –version
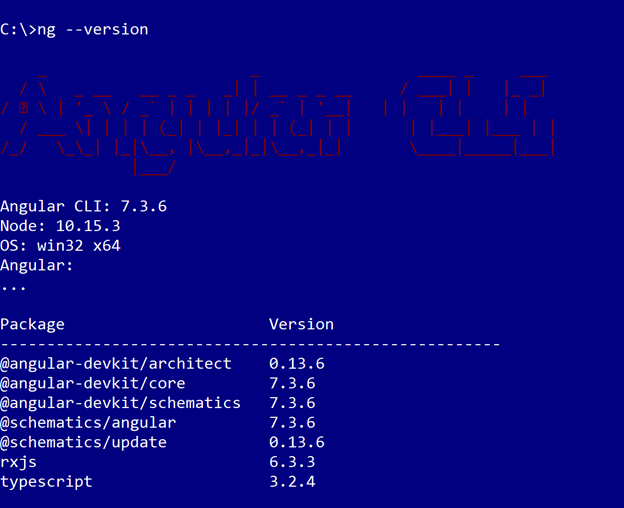
You should see the versions of Angular CLI and other packages. Once you see the version number as in the above image, you can be sure that Angular CLI is successfully installed on your system. Another way to find out that whether Angular CLI is installed globally on the system is to run the npm list command:
npm list -g @angular/cli --depth=0

The above command will return you the version of installed Angular CLI and you will be sure that Angular CLI is successfully installed on your machine.
Upgrade Angular CLI
Sometimes you may have to upgrade Angular CLI to the latest version. You can do that using a combination of these three commands:
npm uninstall -g @angular/cli

npm cache clean

npm install -g @angular/cli
Sometimes you may have to use –force to clean the cache.
Getting help in Angular CLI
You can get help in Angular CLI using the help command:
ng help
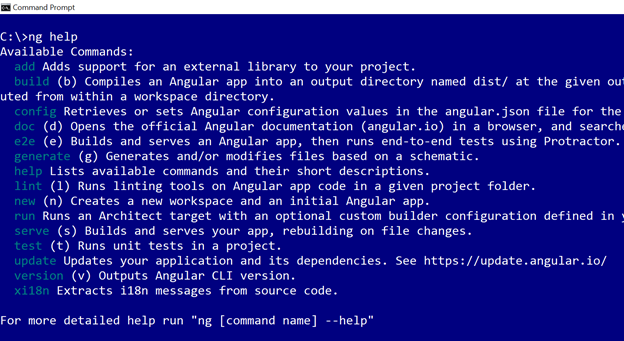
Angular will list all the help options available as shown in above image. You can get help for a specific command by running:
ng [command name] –help
Creating First Application
Once you have Angular CLI installed, you can use its command to generate a new Angular project. You can create a new application using the ng new command:
ng new helloworld --skip-install
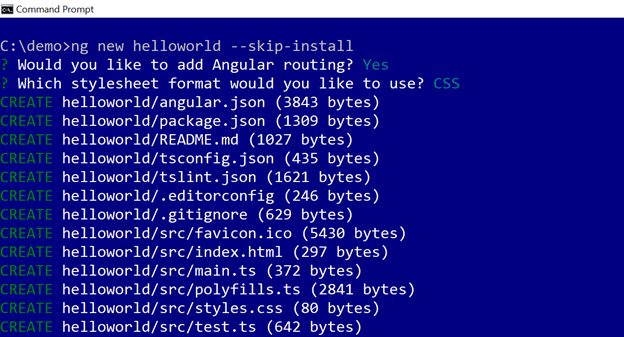
Above we have created a new project called HelloWorld. We selected the option not to install dependencies by using –skip-install. We will run npm install separately to install dependencies. If you run below command, it will create project and install dependencies too.
ng new helloworld
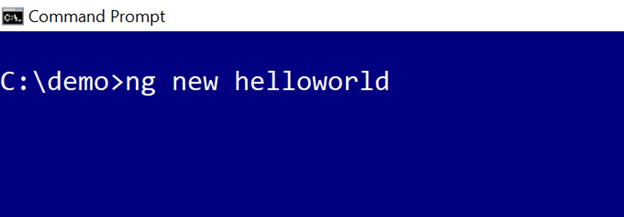
When you create new project using Angular CLI, it will ask you for two options
- Whether you want to add routing to project
- Which styling you want to choose like CSS, SCSS, and LESS etc.
Either you can choose to add routing or not, also you can choose different ways of styling your application. Once the application is created, you can open that in any code editor to work with it. These days, Visual Studio Code is very popular. You can run scaffold application using following command:
ng serve
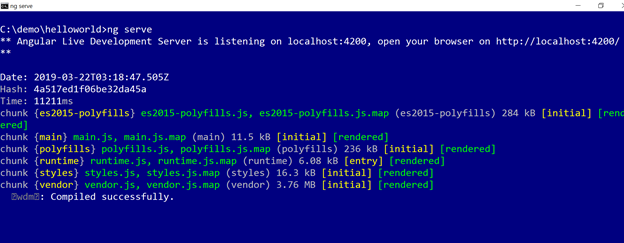
As you see, the application compiled successfully, and by default runs on poet 4200. There are many options available with ng serve command. If you want to explore further, various options are available with ng new command, run it with help:
ng new –help
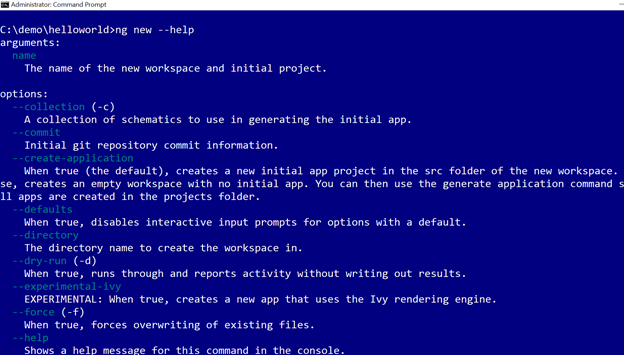
As you see, it has one argument, which is name of the project, besides that are many options available. For example,
ng new HelloWorld –dry-run
The above command will create files without writing anything in it.
ng new HelloWorld –inline-template
The above command includes template inline in the component TS file. There are even command options to use Angular new Ivy rendering.
ng new HelloWorld --experimental-ivy
There are many options available with ng new command, which you should be aware of.
Once you create new project with ng new command, you can open package.json file to explore various options and dependencies.
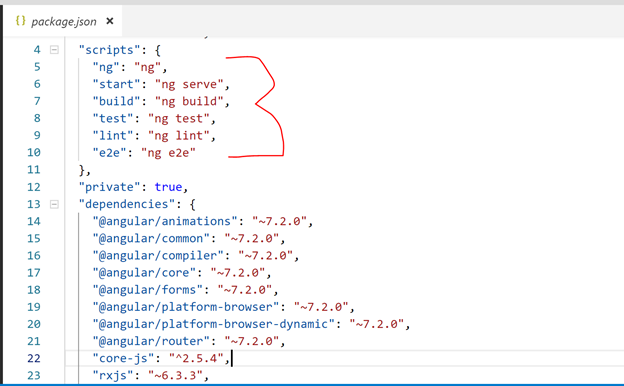
For example, you can change start, build, and test commands on the package.json file for this particular project. In addition, you can find various project dependencies in the file. Another important file, which contains configuration for Angular CLI, is angular.json file.
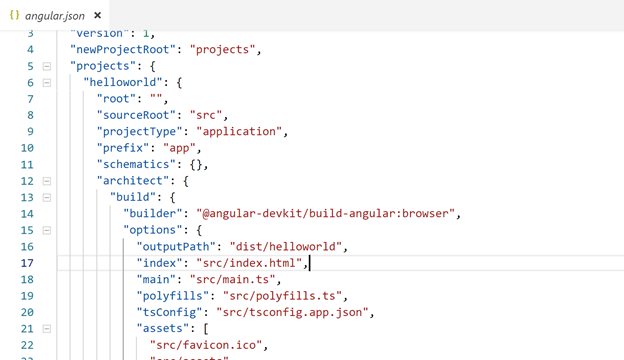
This file contains all configuration information related to Angular CLI for this particular project. For example, let us consider prefix property. By default, it is set to app. So, whenever you create a component, service etc., their name is prefixed with app. As you notice in AppComponent.
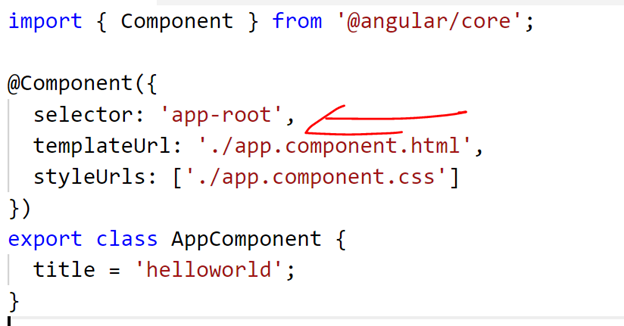
You may have a requirement to change prefix to your business need. Let us say, you want prefix to be set to your company name, foo. You can configure Angular CLI to use foo as prefix instead of app in three ways
- By manually changing angular.json file
- By using –prefix option with ng new command
- By using ng config for global setting
I changed the value of prefix in angular.json and then ran the command to generate a login component. As you see that now generated component has prefix foo used.
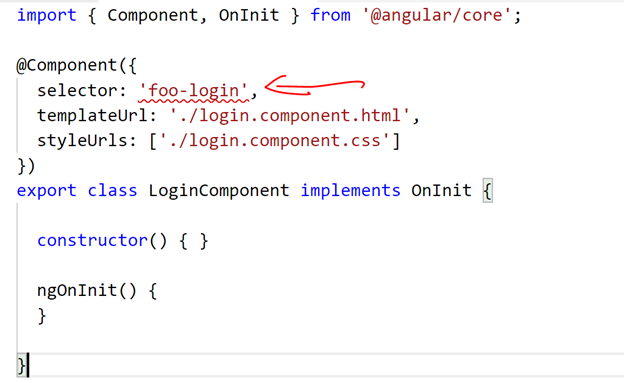
If you do not want to change angular.json, at the time of running ng new you can use prefix option
ng new helloword1 --prefix foo --skip-tests

In above command, we have combined two options. Angular CLI allows you to combine options to create project as you desire. In above command, we are saying create a new project with prefix set to foo and also do not create tests file (*.spec) file. As output, Angular CLI will create project and you will see foo is prefixed, as shown in the below image:
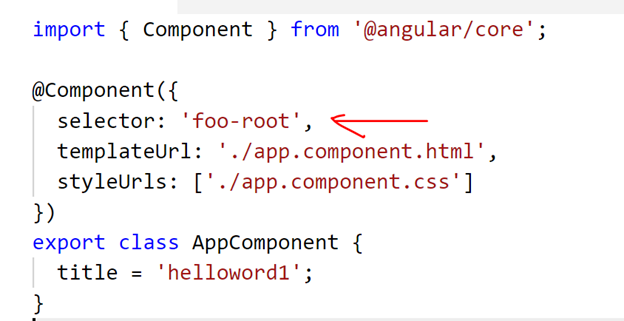
You can combine any number of options with ng new command to get desired configuration for newly created project.
Generate Commands
Angular CLI provides you ng generate command to generate various schematics. For example, you can use:
ng generate component login

The above command will generate a component called LoginComponent in the project. There are many options available with ng generate. You can list them with –help option.
ng generate –help
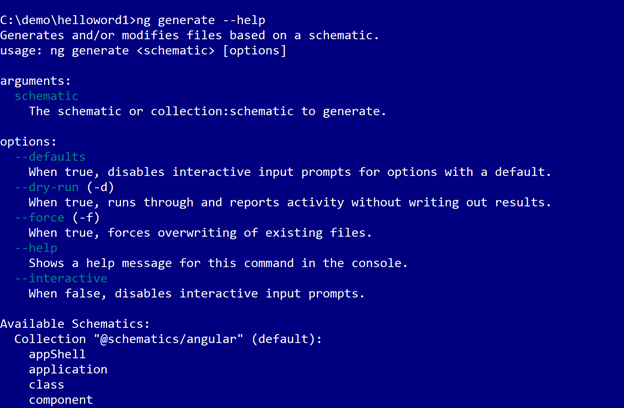
As you see, it takes schematic as argument with various options possible. Available schematic arguments are as follows:
- appShell
- application
- class
- component
- directive
- enum
- guard
- interface
- library
- module
- pipe
- service
- serviceWorker
- universal
Using generate command, you can generate a component or even can add a serviceWorker in your project to convert it to a Progressive Web App.
ng generate serviceWorker

Generate Component
You can generate a new component using ng generate command. Below I am running generate command with dry option.
ng generate component products –dry

We ran generate command with dry option to make sure that everything is correct. You should run a command in dry mode to verify a command. We can generate a component with below command:
ng generate component products

The above command will add a folder named products and the following files in the project:
- component.ts
- component.html
- component.css
It has not added products.spec.ts. file because hellowworld1 project was created with –skip-tests option. You can configure various options with ng generate component to decide whether template and style should be in external files or inline in the component class. You can check available options with –help command.
ng generate component –help
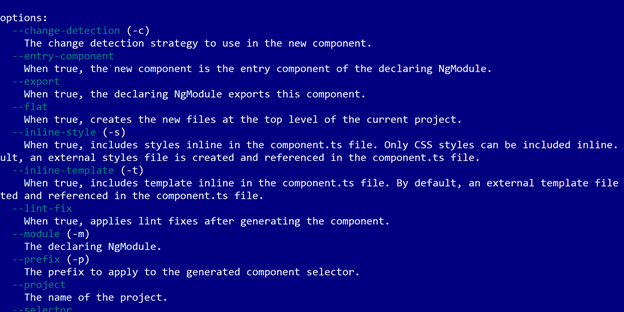
As you see, different options available are:
- –change-detection
- –entry-component
- –export
- –flat
- –inline-style
- –inline-template
- –lint-fix
- –module
- –prefix
- –project
- –selector
- –skip-import
- –skip-tests
- –spec
- –style
- –styleext
- –view-encapsulation
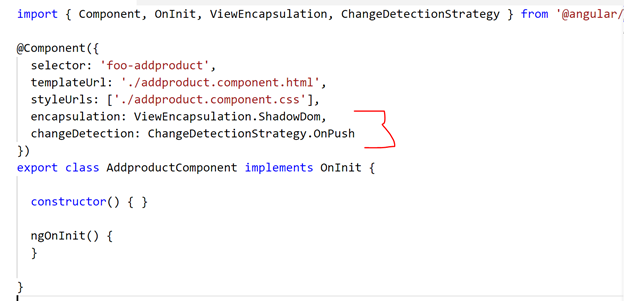
There are shortcuts available for these options also. You can read in detail about component generate options in help. Now let us say, you want to generate a component with view encapsulation and change detection preconfigured. That can be done by below command:
ng g c addproduct --v ShadowDom --c OnPush

Here, I have used the shortcut for command and options. We are configuring component to use Shadow Dom View Encapsulation and OnPush Change Detection. Generated component will look like below:
You can combine many options to generate components as required by your project.
Generate Directive
You can generate directive with the following command:
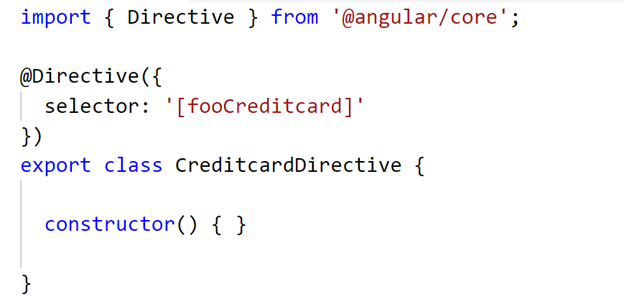
ng generate directive creditcard

The above command will generate a directive in the project as shown in the image below. Keep in mind that selector starts with foo instead of app because we have configured project to use prefix foo while creating it.
Like components, there are many options available with directive generate also. You can list them with –help
ng generate directive --help
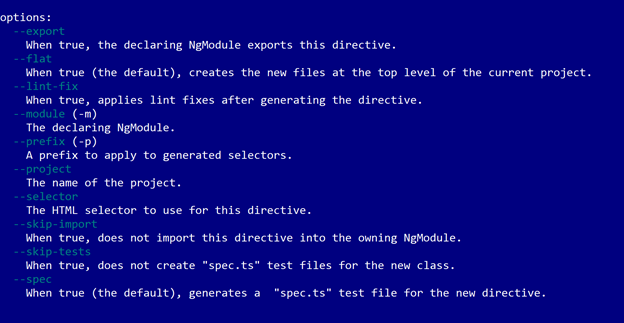
Various options available with directive generation are:
- –export
- –flat
- –lint-fix
- –module
- –project
- –selector
- –skip-import
- –skip-tests
- –spec
You can use these options in various combinations to generate directives as required in your project.
Generate Service
The way you generate component and directive, you can generate
- Service
- Pipe
- Interface
- Class
- Enum etc.
To generate service run command:
ng generate service foodata

The above command will create a service in the project. You can explore:
ng generate –help
To find other schematic options available.
Building and Serving
You can build an Angular application using ng build command:
ng build

As you see that ng build produces files to be downloaded in the browser. They are:
- Main
- Polyfills
- Runtime
- Styles
- Vendor
There are many options available with ng build which you can list with –help command.
ng build –help
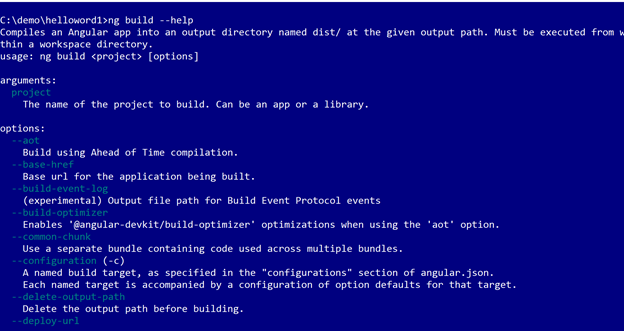
There are many options available, such as
- –aot
- –base-href
- –prod
- –deploy-url
- –output-hashing
- –source-map etc.
There are many options available those above-listed options. You can learn in detail in the help.
If you want to build and serve your application tracking the file changes, you should use ng serve command. By default, it serves application on port 4200.
ng serve
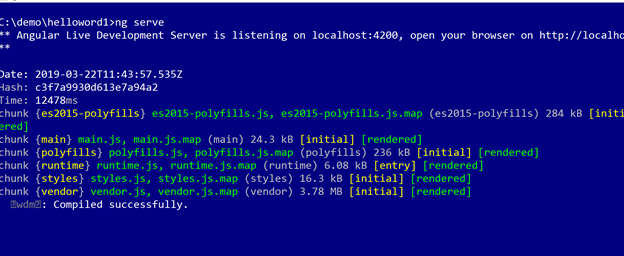
If you’ve done it successfully, you should see the Successfully Compiled message as shown above. In addition, it is saying that application is listening at port 4200. You can list various options available with ng serve using –help command.
Summary
In this article, we learned about Angular CLI and various command available with it. You should use Angular CLI for faster development of Angular applications.