
="Create new project."] :asp-net:
NuGet is a powerful ecosystem of tools and services. It was introduced in 2010 as an open source package manager for the Microsoft development platform including .NET. NuGet is the easiest way to improve and automate your development practices.
When you install a package via NuGet, it copies the library files to your solution and automatically updates your project. That means adding references, changing config files, replacing old version script files, etc.
NuGet is available since Visual Studio 2010 and since Visual Studio 2012, it is included by default. On more information on how to get going with it, read the official Nuget documentation.
Ultimate UI for ASP.NET controls are available to explore as a NuGet package and this is the easiest and the fastest way to install the Infragistics assemblies required for your project.
To use the ASP.NET NuGet packages you need to install them locally by running the NuGet installer. The installer will automatically create a local feed named “Infragistics (Local)”, which will display all the ASP.NET NuGet packages that are available. During the installation if you leave the product key field empty, the installer will install the trial version of the packages. Have in mind that you will have to install a later version of the packages manually if you want to update the assemblies you use to the latest version available.
There are two ways to install the ASP.NET NuGet package to your project, using the GUI or using the console, and we will follow both procedures below. All the steps and screenshots are taken in Visual Studio 2015 but if you are using an older version of Visual Studio, the differences are negligible. Don`t worry if you haven`t used NuGet before as this example will guide you step-by-step through the procedure.
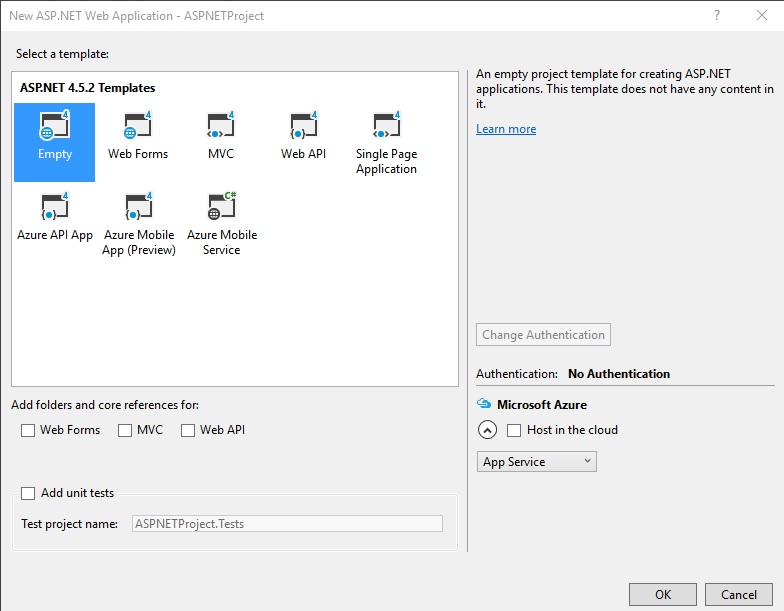
First create a new ASP.NET Web Application project. You can name it ASPNETProject
image::images/asp_nuget_1.jpg[alt2. Select Empty project.
After your project is created, your Solution Explorer will look like this:

At the moment, your project contains only the three default nodes: Properties, References and Web.config.
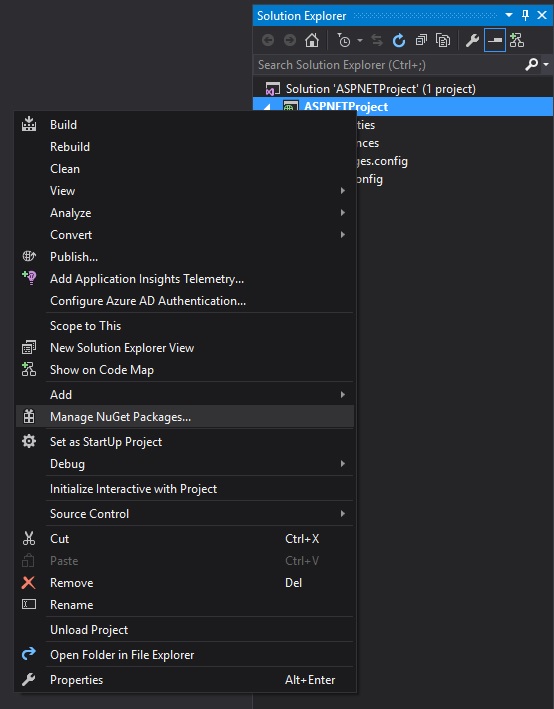
To install the ASP.NET NuGet package using the GUI, you should right-click on the project name and select Manage NuGet Packages… from the context menu.
This will open the Manage NuGet Packages view. In this view you can see all the packages that are available for you to use in your project.
Now you should change the package source to Infragistics (Local).
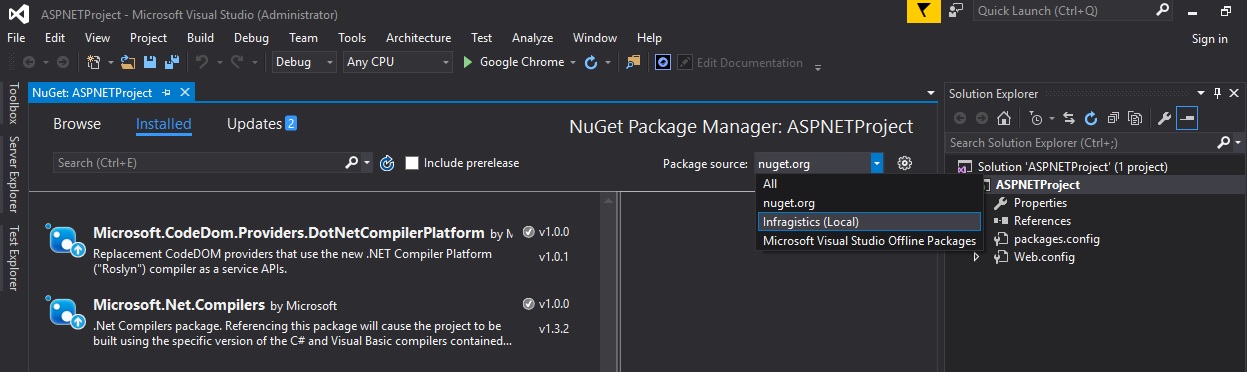
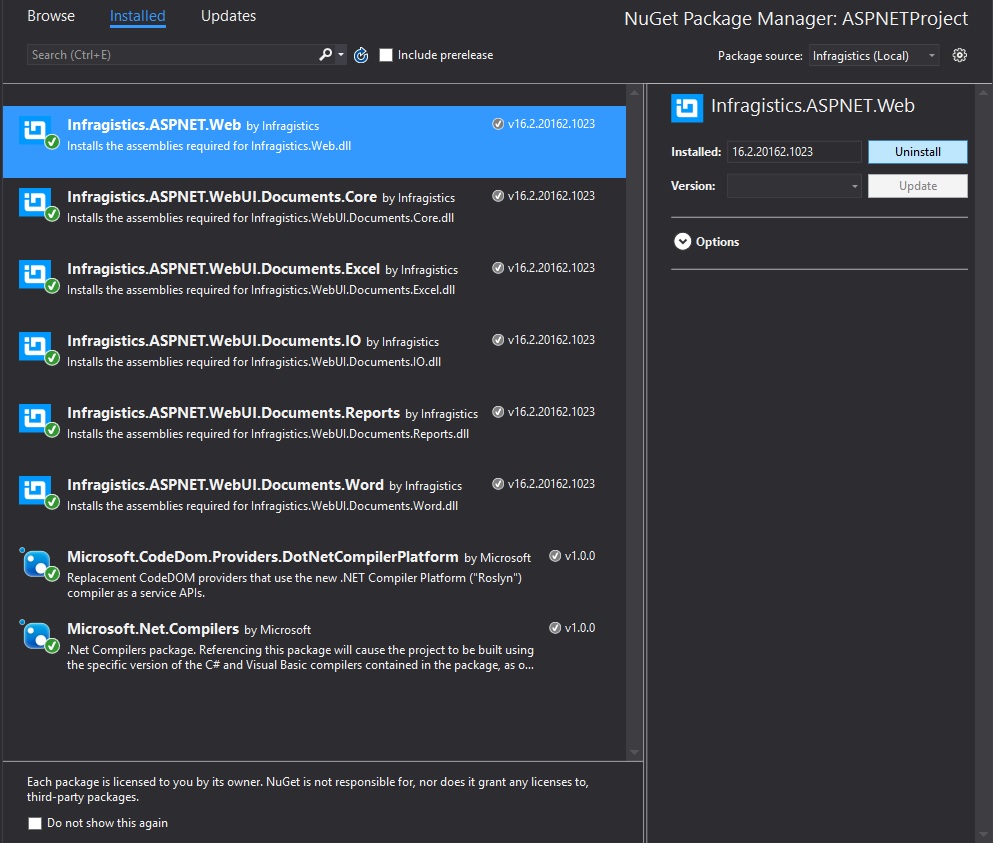
Navigate to the Browse tab and you will see the list of available Ultimate UI for ASP.NET NuGet packages.
When you select a package, you will see more information of it in the right panel. The most important information in this panel is the list of dependencies for the selected package. Those are assemblies that will be installed automatically to your project and you don`t have to worry about those.
Click the Install button and the selected package will be added to your project.
Here we will describe how you can add ASP.NET package using the Package Manager Console. Using the Console may be a bit faster as you do not need to search for the package that you want to install.
To show the Console, navigate to Tools in the Visual Studio`s menu and after hovering NuGet Package Manager, select Package Manager Console.

The Package Manager Console will be shown at the bottom of the screen and you just need to enter “Install-Package name_of_the_package” to initiate the installation. For example, if you want to install “Infragistics.Web.dll”, you must enter Install-Package Infragistics.ASPNET.Web and the manager will install this assembly and all the assemblies it depends on. Note that in the console you should select Infragistics(local) from the Package source drop down.
When the installation is finished, you will see a message in the Console that your ASP.NET package is successfully added to the project.
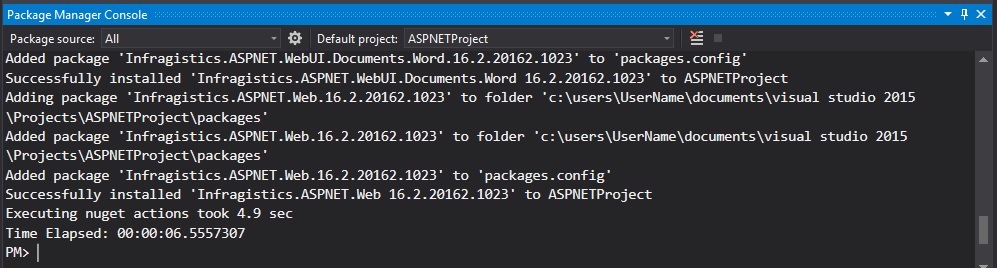

As you can see, references to some new assemblies are added to your project and the packages.config file is also updated to include the added packages.
You can uninstall any of the assemblies installed with the package. This can be done either using the GUI or the Package Manager Console. You can use any of the approaches no matter if you have installed the package via the GUI or via the Console.
To remove an assembly right-click the project again and select Manage NuGet Packages. The view is opened and is showing all the installed assemblies. Select the one you want to uninstall and click the Uninstall button.
Have in mind that this will uninstall only the assemblies you have selected and all other assemblies that were installed with the package as dependencies will be preserved.
In addition, you will not be able to uninstall an assembly if another one depends on it. For example, if you have installed Infragistics.ASPNET.Web to your project and for some reason try to uninstall Infragistics.ASPNET.WebUI.Documents.Core+ which was installed as a dependency, you will see an error saying you are not able to uninstall it because another assembly depends on it. If you want to uninstall it, you must first uninstall all the assemblies that depend on it.

To uninstall an assembly through the Console, enter “Uninstall-Package name_of_the_package”. For example, Uninstall-Package Infragistics.ASPNET.WebUI.Documents.Excel.
The ASP.NET NuGet packages will boost your productivity and they are the fastest way to start creating your next high-performance application.