Step-by-Step Guide Using Ignite UI CLI
The Ignite UI CLI step-by-step mode is an interactive wizard that guides you through project creation, template selection, theming, and component view addition for Ignite UI CLI-based Angular projects. It covers the same operations as the non-interactive ig new and ig add commands but prompts you at each step rather than requiring all arguments upfront.
The step-by-step mode does not support scripted or non-interactive use - for that, use the direct ig new and ig add commands with explicit arguments. The wizard relies on Inquirer.js; see supported terminals for compatibility.
To activate the wizard, run:
ig
or:
ig new

Building Your First Ignite UI CLI App
Create new project
First you will be prompted to enter a name for your application:

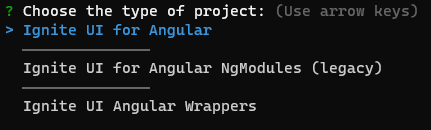
After selecting Angular as a framework, you will be prompted to choose the type of the project to be generated:
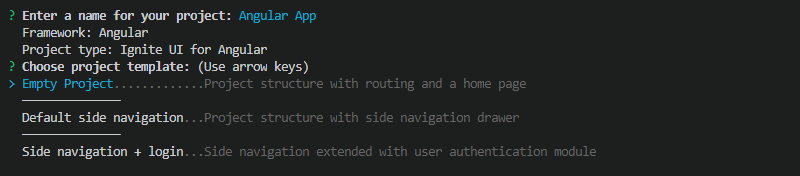
Then you will be guided to choose one of the available project templates. You can create an empty project, a project with side navigation, or an authentication project with a basic authentication module. Navigate through the available options using the arrow keys and press ENTER to confirm the selection:
The next step is to choose a theme for your application. Selecting the default option includes a pre-compiled CSS file (igniteui-angular.css) with the default Ignite UI for Angular theme in your project's angular.json. The custom option generates a color palette and theme configuration using the Theming API in app/styles.scss.

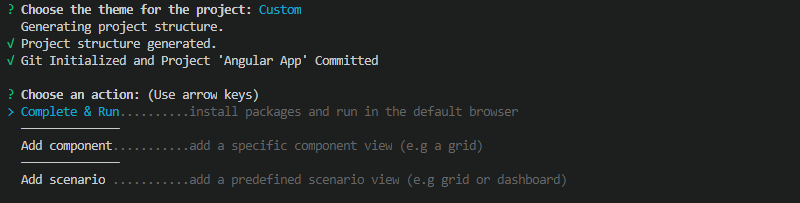
After completing the above steps, the application structure is generated, a Git repository is initialized, and the project is committed. You will then be asked whether to complete the process or add a new view to your application:
Add view
The Ignite UI CLI supports multiple component templates and scenario templates that can be added to a project. This mode can be activated either as a continuation of project creation or inside an existing project using the command below.
ig add
You will be provided with a list of the available templates, grouped by category.

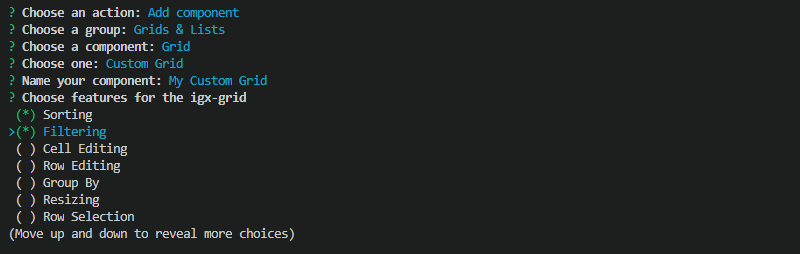
Use the arrow keys to navigate through the options and ENTER to select. For some templates, such as Custom Grid, you will be provided with a list of optional features that can be toggled with the SPACE key:
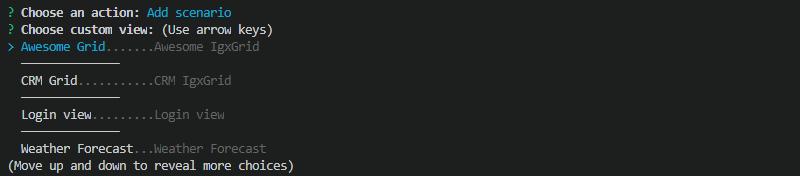
If you choose to add a scenario to your application, you will also get a list of the available scenario templates:
After adding a template, you will be asked whether to add more views or complete the process. On completion, any remaining package dependencies are installed and the application is served and opened in your default browser.
To add more Ignite UI for Angular views to a project later without the wizard, use the direct add command:
ig add [template] [name]
 GitHub